
The Expensive Look Is Mostly Finish, Not Square Footage
Walk into a kitchen that feels expensive and ask what is doing the work. It is almost never the size of the room. It is the finish: paint that looks deliberate, hardware that feels solid in the hand, a faucet with real presence, light that lands warm on the counter. Most of what separates a modest kitchen from a costly-looking one is a handful of physical changes — things you screw, paint, wire or tile into place.
This article is about those physical changes only — not decorating and not storage. For the look-and-feel side, our small kitchen decor ideas cover that; for fitting everything in, our 10 small kitchen organization ideas cover the inside of the cabinets.
On cost: prices vary too much by city and store for exact dollar figures, so each upgrade is labeled by relative cost — small, medium or larger — and whether it is a weekend DIY job or one for a professional. Start at the top.

The Cabinets
1. Paint the Cabinets a Designer Color (Medium Cost, Weekend DIY)
Cabinets are roughly two-thirds of what your eye sees in a small kitchen, so changing their color changes the whole room. Use cabinet-specific enamel, not wall paint — it levels flatter, resists chips and wipes clean. Remove the doors, label each one, degrease, sand, prime, then apply two thin coats. For color, pick one confident choice: a soft sage like the one in the photograph above, a dusty blue-grey, or a deep green below with white uppers. Two-tone is the designer’s trick for small rooms: the darker base grounds the room while pale uppers keep it airy. If your cabinets are warped or peeling, paint will not save them; buy new doors instead — still far cheaper than new cabinets.
2. Add Trim and Crown Molding So Builder Cabinets Look Built-In (Small to Medium Cost, Weekend DIY)
The difference between builder-grade and custom cabinets is often a few inches of trim at the top. Crown molding bridges the gap between the cabinet tops and the ceiling, making standard boxes look built for the room. The photograph below shows it: a simple stepped crown over grey cabinets, with warm wood underneath, reads custom though the cabinets are ordinary. Measure the gap first — if the cabinets nearly touch the ceiling, a single crown strip is enough; if not, add a filler board first. Paint the trim the same color as the cabinets, and add a matching toe-kick trim at the bottom.

3. Open Up One Cabinet Run (Small Cost, Half-Day DIY)
Upper cabinets can make a small kitchen feel like a box; removing one run changes its proportions overnight. Take the doors off a single section — over the coffee station or beside the window — and you have open shelving without buying anything. Or remove one whole upper cabinet and fit two thick wood shelves on brackets, stained to match your counter or floor. This is a physical change: you are removing doors, filling hinge holes, patching the carcass, and fixing solid wood shelves that must hold real weight — anchor brackets into studs. Do one run only: no uppers at all looks unfinished, while one open run gives you air and a focal point.
The Touch Points
4. Swap the Hardware — and Size It Up (Small Cost, One Afternoon)
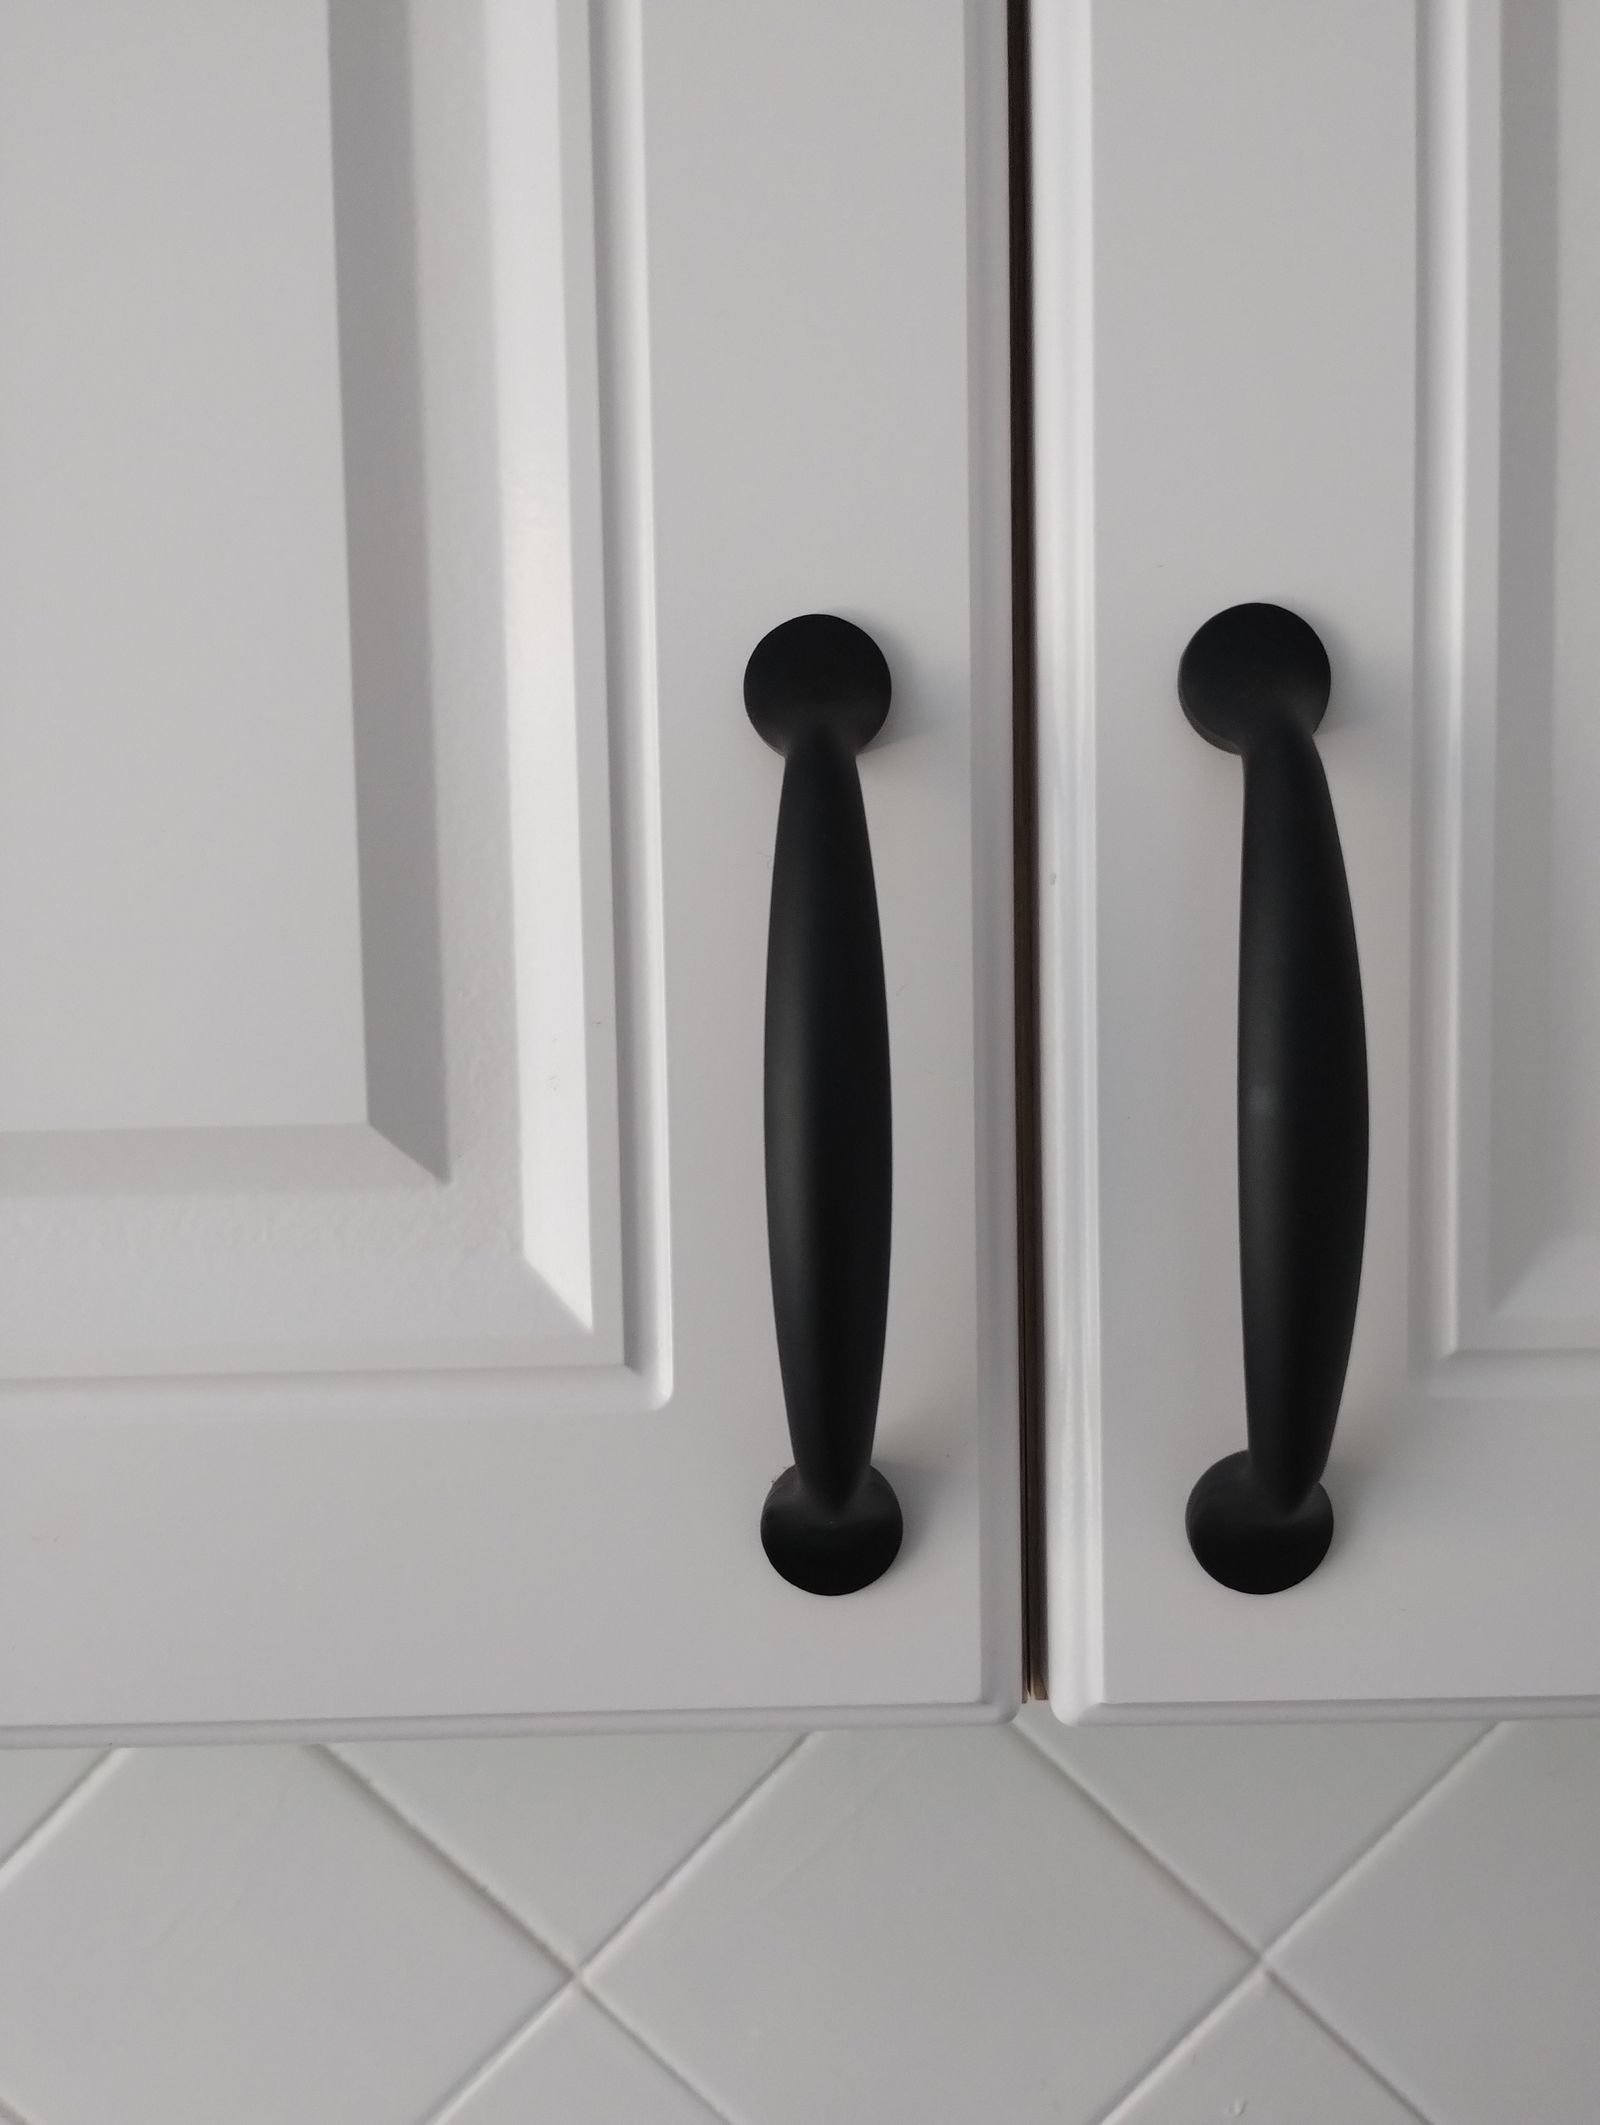
Cabinet knobs and pulls are the jewelry of the kitchen — and the thing your hands touch a dozen times a day. Swapping it is the easiest upgrade here: a screwdriver, an afternoon, and the whole kitchen feels new. The photograph below is the proof — matte black pulls on white cabinets, and plain doors suddenly look tailored. Two rules. First, one finish, repeated everywhere: brushed brass, matte black, unlacquered bronze or polished nickel. Second, size up: longer pulls on drawers, roughly a third of the drawer width, look substantial, where tiny knobs look like an afterthought. Check the hole spacing on your current hardware before you order; matching it means no new holes to drill and fill.
5. Change the Faucet — the Sink’s Jewelry (Medium Cost, Half-Day DIY or a Plumber)
A faucet is always visible and always used, which is why a dated one drags the whole room down. A well-proportioned pull-down in a warm finish — brushed brass, champagne bronze, matte black — becomes the focal point of the sink wall. The gold faucet in the photograph below does exactly this: against a marble-look backsplash it is the first detail the eye lands on. Match the finish to your hardware, and the shape to your sink: a high-arc pull-down suits a deep single sink, while a lower bridge faucet suits a traditional kitchen. Check the hole count on your sink before you buy — a three-hole faucet will not fit a one-hole sink without a cover plate. If your plumbing is old or the shut-off valves are seized, this is a plumber’s hour.

6. Upgrade the Sink Itself to an Undermount (Larger Cost, Hire a Professional)
If the faucet is the jewelry, the sink is the setting — and a drop-in sink with a lip sitting proud of the counter is one of the clearest builder-grade tells. An undermount sink, mounted beneath the counter, reads custom and makes wiping crumbs into the sink easy. A workstation sink adds a ledge for a cutting board and colander, so the sink becomes a prep station. This is the most expensive upgrade here relative to its size, and it is not a DIY job — it needs the counter cut and the sink properly supported and sealed. Do it when you are already changing the faucet — the two install together, and the combined effect is a whole new sink wall for one professional visit.
The Surfaces
7. Take the Backsplash Further — Full Height, or One Real Tile (Medium Cost, Weekend DIY)
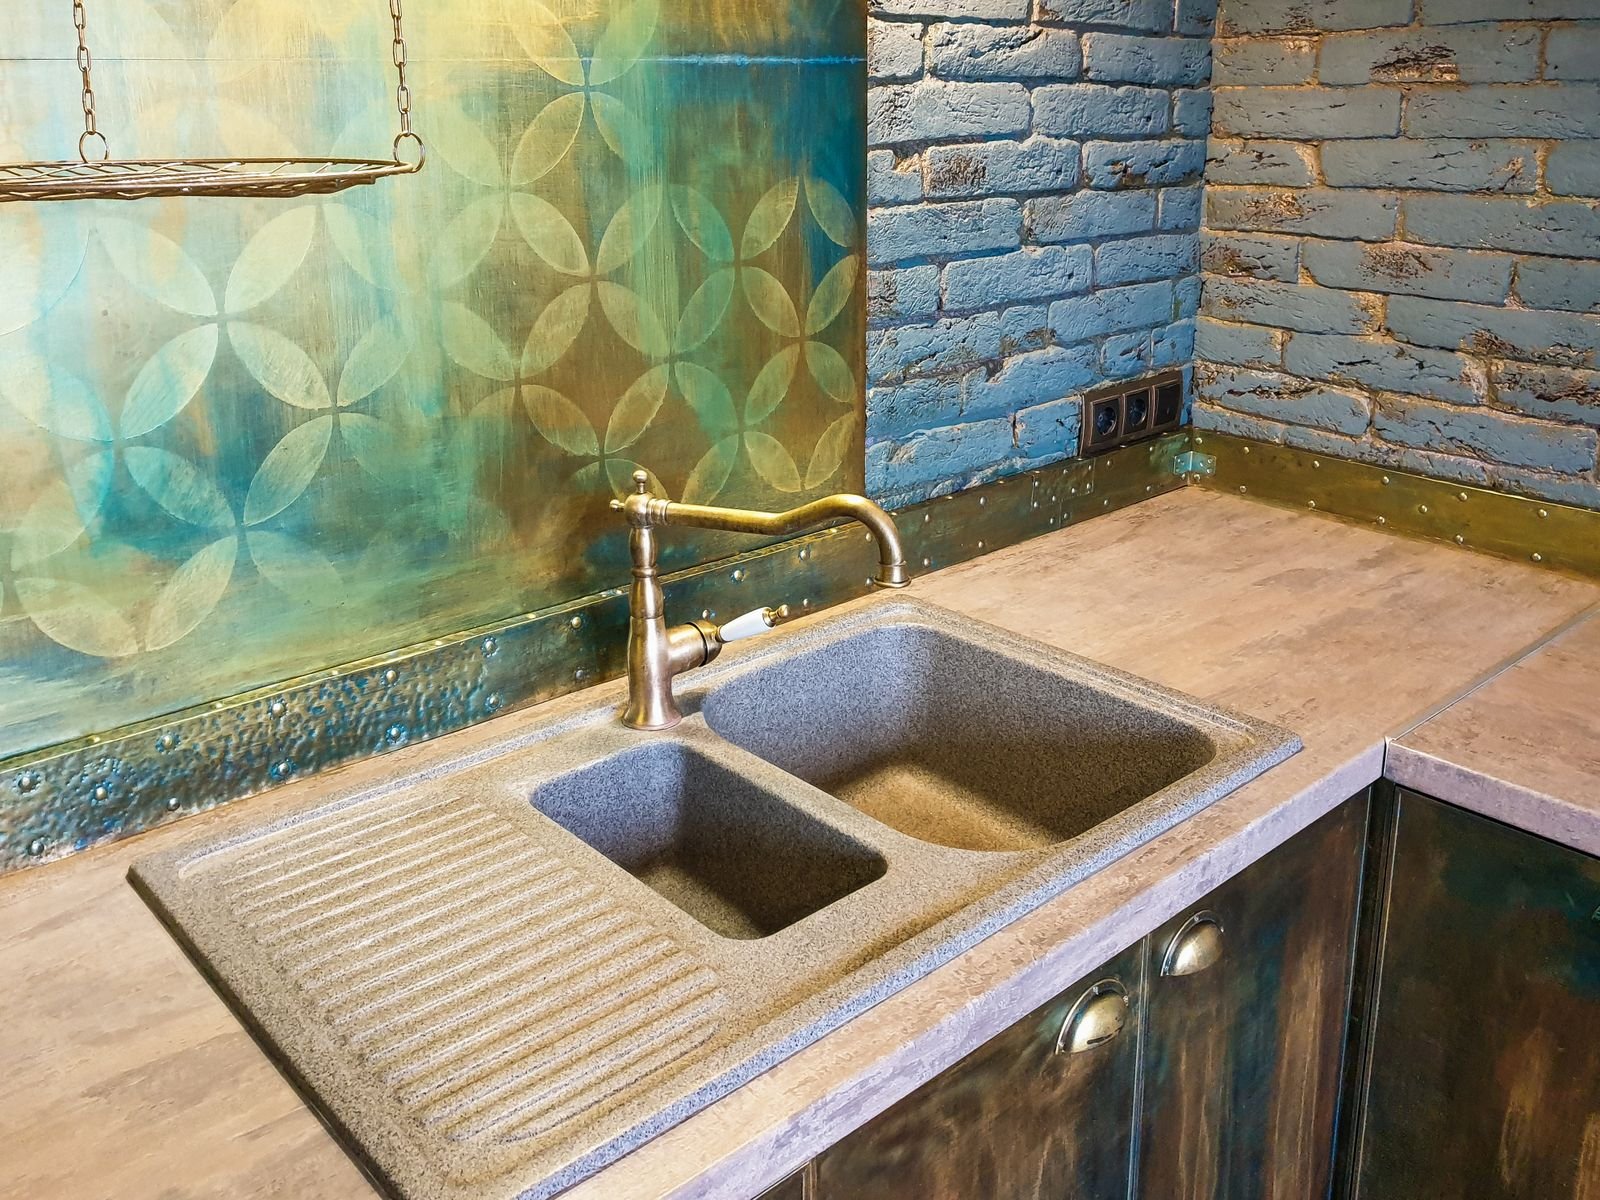
A four-inch strip of tile riding the top of the counter is a giveaway: it reads builder-grade because it is builder-grade. The fix is to take the tile further — up to the upper cabinets at minimum, ideally full-height behind the stove or sink, where the eye rests longest. Full-height tile turns a wall into a feature. The brass faucet and stone sink in the photograph below sit against a painted brick backsplash wall, and the wall does half the work of making that corner feel intentional. Choose a quiet tile: large-format subway tile in a vertical stack has fewer grout lines than small mosaics, and a handmade-look glaze catches the light in a way flat tile never does. Match the grout to the tile; dark grout on pale tile makes a new backsplash look busy and cheap.
8. Refresh the Countertop Without Replacing It (Medium to Larger Cost, Weekend DIY to Professional)
New stone counters are the most expensive single item in a kitchen — and the least necessary in a small one. Three cheaper physical changes carry most of the weight. First, a butcher-block overlay on one run — usually the island — adds warmth that stone cannot. Second, resurfacing: a professional epoxy or stone-look coating over sound laminate, or a new laminate in a modern matte finish, costs a fraction of replacement and looks new from standing height. Third, the edge: a new edge strip or a thin overlay panel on the exposed island edge hides a chipped or dated profile for very little money. Seal wood counters properly: unoiled butcher block stains in a month, and a stained counter is worse than the old one.
The Light
9. Add Real Under-Cabinet Lighting — Wired, With a Dimmer (Small to Medium Cost, DIY or an Electrician)
Under-cabinet lighting changes how the kitchen feels after dark, and most small kitchens simply do not have it. A warm LED strip under the uppers turns the counter into a glowing work surface, makes the backsplash catch the light, and lets you turn the harsh overhead off in the evening. This is a wiring upgrade, not a styling choice: hardwired strips on a dimmer, so the light is part of the room rather than a gadget stuck underneath it. If you rent, or wiring is out of reach, rechargeable light bars are the honest stepping stone — our wireless under-cabinet lights guide compares the options that look built-in. Keep it warm at 2700K, and use a dimmer: one light, two jobs.
10. Swap One Light Fixture for a Real Pendant (Small to Medium Cost, Half-Day DIY or an Electrician)
One fixture swap changes the ceiling the way hardware changes the cabinets. A single oversized pendant over the sink or the island draws the eye upward, makes the ceiling feel higher, and gives the room its one piece of jewelry at eye level and above. Look for brass, smoked glass or a simple linen shade, and hang it low enough to matter — roughly at head height over the island, not lost against the ceiling. Scale is the rule: a pendant too small looks like a lost earring, and one generous pendant beats two timid ones. If your ceiling has only a flush mount, this is an electrician’s hour; if a hanging fixture is already there, it is a straightforward swap with the breaker off.
The Finish
11. Paint the Island — or One Run — a Second Color (Small Cost, Weekend DIY)
If the room still feels like one flat color after the big moves, the final upgrade is the smallest one: paint the island, or one run of lowers, a second, deeper color while the rest stays pale. A deep green, navy or charcoal island against white cabinets makes a kitchen look designed rather than assembled, for a quart of paint and a weekend. This only works after the other upgrades — a painted island on builder cabinets with dated hardware still reads as exactly that. But once the hardware, faucet and lighting are right, the second color is the signature that ties the room together. Keep it in the same family as the rest of the room, and repeat it once on a stool or a shelf bracket, so it reads as a choice.
The Order That Works (and What to Skip)
The order that works is: paint, trim, hardware, faucet and sink, backsplash, counters, lighting, then the second color last — in any other order you pay twice. Skip what costs a lot and changes little: a pot filler gets used twice a year. And skip any upgrade that fights the house — a marble-look backsplash in a cottage kitchen will always look like a showroom sample.

A small kitchen does not need a renovation to look expensive — just a few physical changes in the right places: paint, solid hardware, a faucet with presence, tile that runs further, and light that lands warm where you work. Do three or four and the room reads custom; do them all, and guests will assume you spent far more than you did.
Small Kitchen Upgrades Questions
What is the cheapest kitchen upgrade that looks expensive?
Swapping the cabinet hardware. One consistent finish, sized-up pulls, an afternoon with a screwdriver.
Should I paint my kitchen cabinets or replace them?
Paint them if the boxes are sound and the doors are solid; replace the doors only if they are warped or peeling.
Is under-cabinet lighting worth it in a small kitchen?
Yes — warm LED strips under the uppers make the counter glow and let you turn the harsh overhead off. Wired with a dimmer is best.
How much should I budget for small kitchen upgrades?
Think in tiers: hardware and a faucet are the small tier; paint, trim and a backsplash the medium tier; a new sink or countertop refresh the larger tier. Most small kitchens feel transformed after the first two tiers alone.